All posts by kimshealthyeats

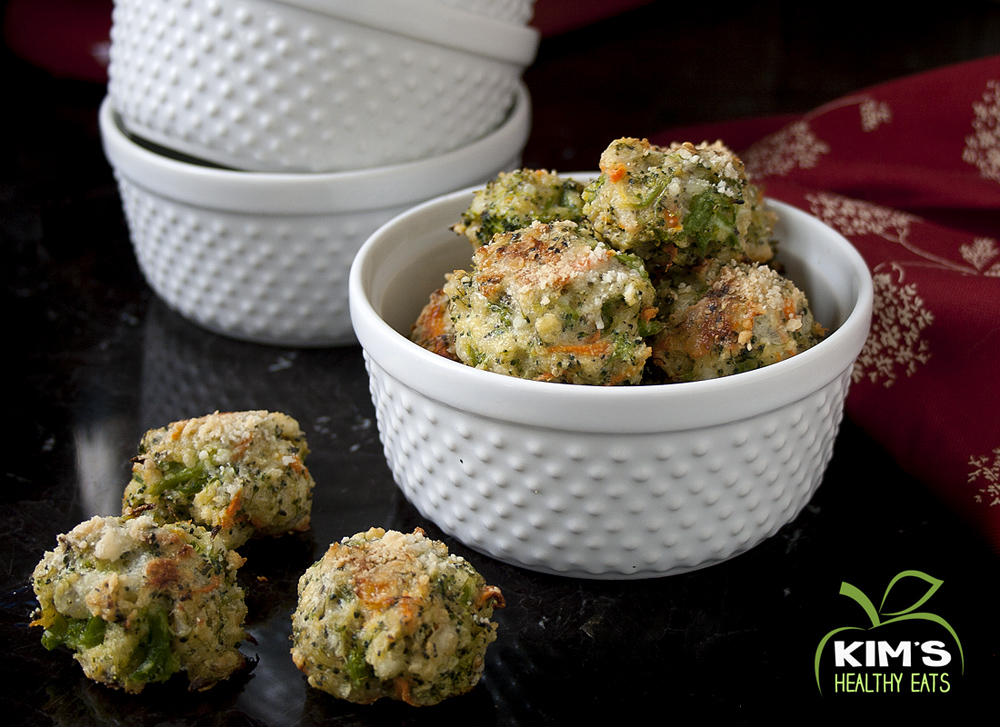
Broccoli Bites

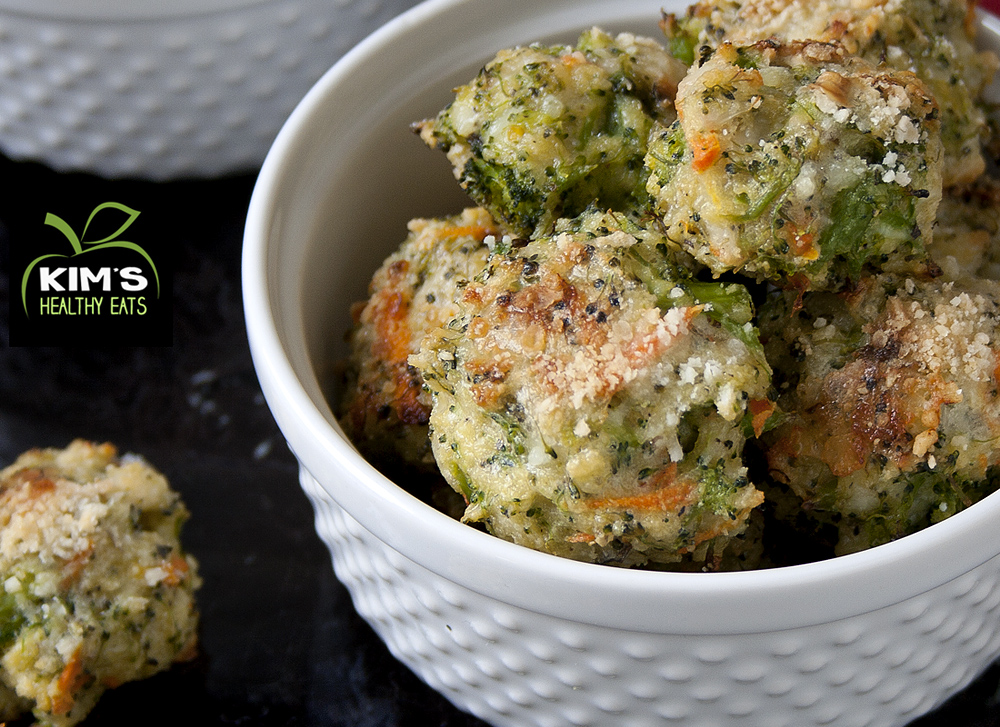
Going green for tonight’s St. Patty’s festivities! That’s right, we’re finally going out for St. Patrick’s day. We have an overnight sitter and we’re ready to party! Back to the broccoli bites. We’re having some friends over before our big night on the town, and I needed a quick and easy snack. These are not only festive, but really good. They’re full of veggies and make a great healthy snack. I think I may just need to make some extras for a snack later this week.

broccoli bites

did-you-know

Did you know broccoli contains high levels of both calcium and vitamin K, both of which are important for bone health and prevention of osteoporosis.  This is great news if you’re not a fan of milk.  Click here for more great health benefits from broccoli.

broccoli bites

Ingredients

  • 1 medium head of broccoli, cut into very small pieces
  • 1 small carrot , peeled and shredded
  • 1 garlic clove, pressed
  • 3/4 cup cheddar cheese
  • 3 eggs, beaten
  • 1 cup of panko or bread crumbs
  • 1 tablespoon Italian seasoning
  • Salt and pepper to taste

Directions

  • Pre heat oven to 350 degrees. Steam broccoli pieces for a few minutes, until they turn a nice bright green. Let cool.
  • In a large bowl combine all ingredients and mix well.
  • Shape into bite size broccoli balls.
  • Bake on parchment paper for about 18-20 minutes or until golden brown.
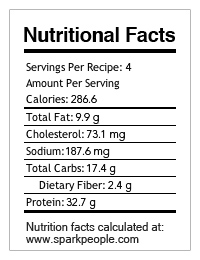
nutritional fact - broccoli bite

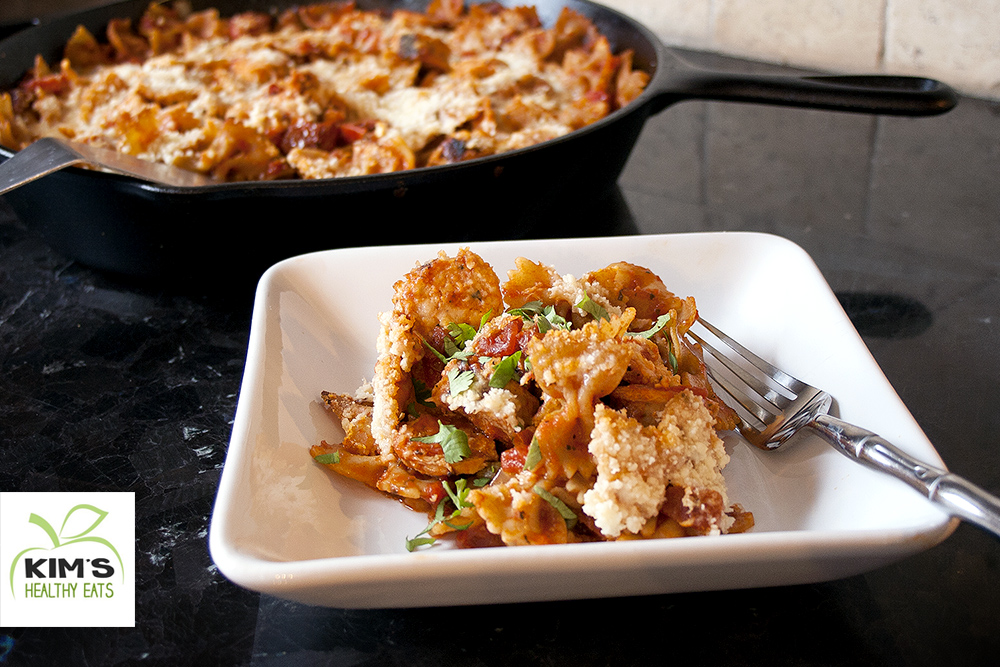
Last Minute Skillet Pasta Recipe

Another crazy busy week night and I’m starving. Luckily, I had taken some sun dried tomato chicken sausage (free range chicken of course) out of the freezer recently. Now what to do with it?

I found some whole wheat bow tie pasta in the pantry and diced tomatoes. That’s a start! Of course I never made it to the store this weekend for fresh veggies. I’m really missing the local produce stands to quick stop at on my way home from work.

While digging through the fridge I found a jar of leftover sun dried tomatoes, roasted red peppers, and capers. I know, who keeps that stuff laying around in the fridge?  I like to buy that stuff in bulk so I always have a meal to throw together.  Of course fresh veggies would work wonderfully in this dish. Fresh peppers, zucchini, yellow squash, just about anything!  Oh well, next time.

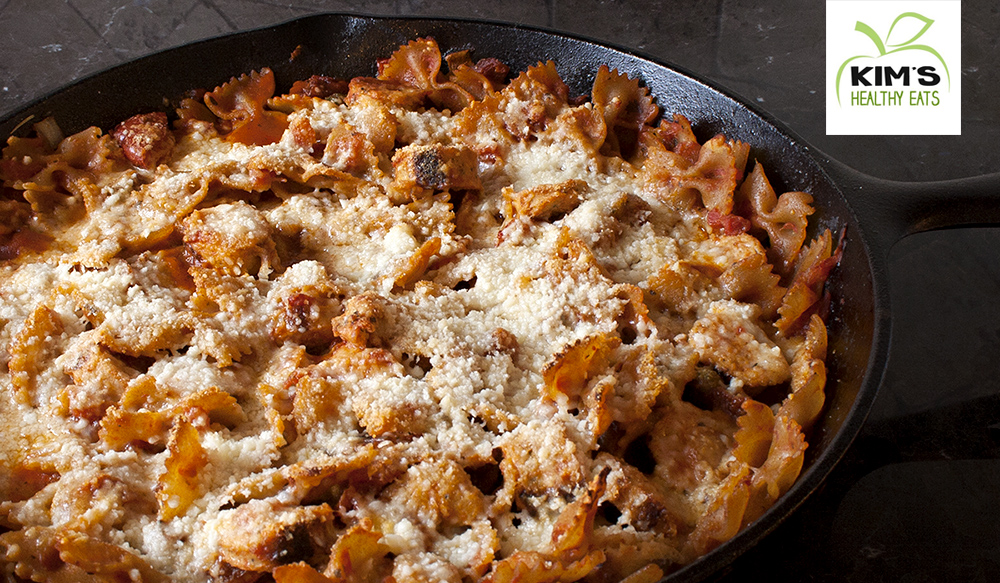
Considering the circumstances, the dish came out great!

Skillet Pasta Recipe

did-you-knowSun dried tomatoes contain many antioxidants that help fight many types of cancers and also help boost immunity. Just one cup contains 9 percent of the daily value for vitamin A and 35 percent of the daily value for vitamin C.  Click here to learn more about the benefits of sun dried tomatoes.

Skillet Pasta Recipe

Ingredients

  • 1 package Italian chicken or turkey sausage (or no meat at all!) This recipe would also work with ground meat or shrimp.
  • 1/2 to 3/4 pound of pasta, cooked (I used bow tie)
  • 1 teaspoon olive oil
  • 1 onion, diced1 large roasted red pepper, sliced into strips
  • 1/2 cup sun dried tomatoes, sliced into thin strips
  • 1/4 cup capers
  • 2 garlic cloves, pressed
  • 1 can petite diced tomatoes
  • 1/2 jar pasta sauce
  • parmesan or mozzarella cheese

Directions

  1. Heat oven to 375 degrees.
  2. Cook sausage in a pan with a little bit of water until no longer pink and cooked through. Drain water and saute until nice and brown. Cut into bite size pieces and set aside.
  3. Cook pasta according to package directions. Set aside.
  4. Heat olive oil in cast iron skillet (or a skillet you can put in the oven) over medium high heat. If you do not have one, cook in a regular skillet and transfer to a baking dish.
  5. Saute onion for a few minutes. Add roasted red pepper, sun dried tomatoes, capers, and garlic. Saute for a few minutes until garlic is cooked.
  6. Lower skillet heat to medium low. Add can of diced tomatoes and pasta sauce. Cook until nice and bubbly.
  7. Add cooked pasta and sausage and stir.
  8. Top with cheese and put the skillet right into the oven, or transfer to baking dish and bake for about 15-20 minutes.

    Nutritional facts coming soon.  I Promise. 🙂

Enjoy!

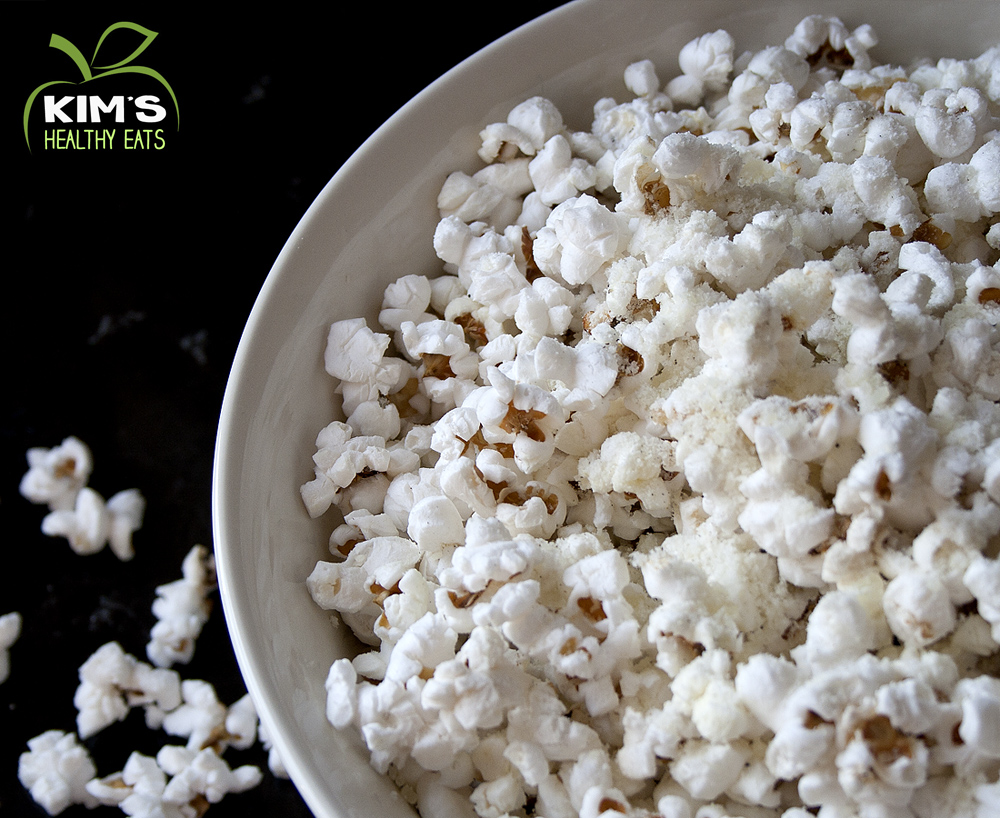
Stove Top Popcorn

For me, Sunday night is tv night.  And who doesn’t love eating popcorn when you’re watching your favorite show. Growing up my mom always made popcorn on the stove top. Now most make popcorn in the microwave. These microwave bags of popcorn are loaded with harmful chemicals. Making popcorn on the stove is easy, inexpensive, and much better for you since you control the ingredients.

popcorn

did-you-know

Microwave popcorn contains a chemical called diacetyl. This chemical is added to give the popcorn it’s golden color and distinctive microwave popcorn smell. Microwave popcorn also contains a coating, which breaks down when heated called perfluorooctanoic (PFOA). It has been identified as a “likely carcinogen” by the Environmental Protection Agency. I don’t know what this stuff is, but I definitely know I don’t want to eat it!

Directions

  1. Heat a large pot with 3 tablespoons of oil (olive oil, coconut, grape seed, your choice) over medium heat. 
  2. Add 1/2 cup of popcorn kernels and cover with lid. Popcorn will begin to pop in a few minutes.
  3. Cook until kernels slowly stop popping. About 4-6 minutes.
  4. Top with your favorite ingredients. I like parmesan cheese and sea salt.


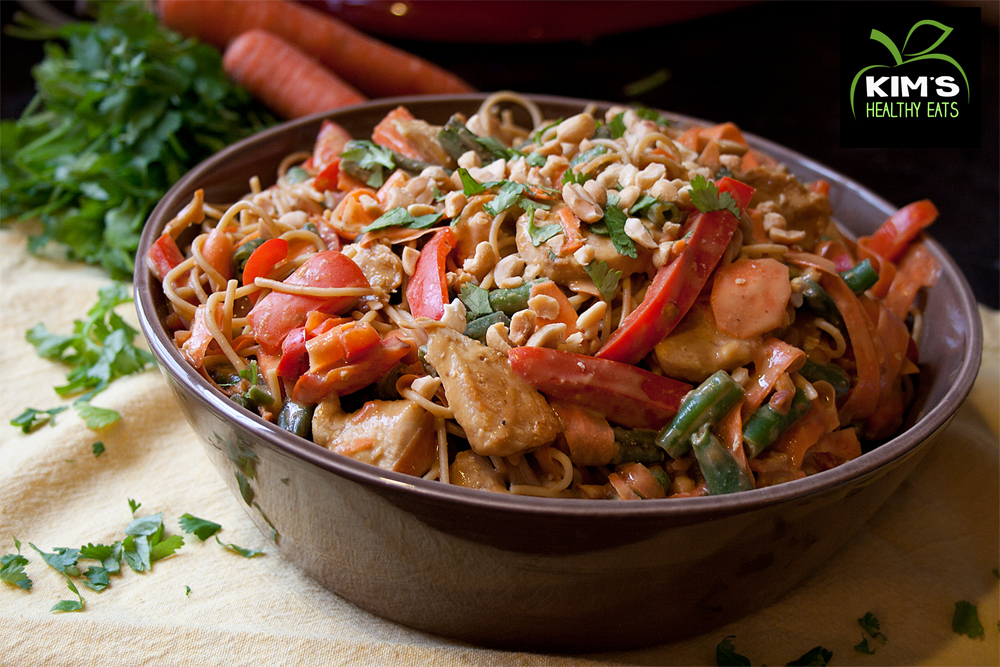
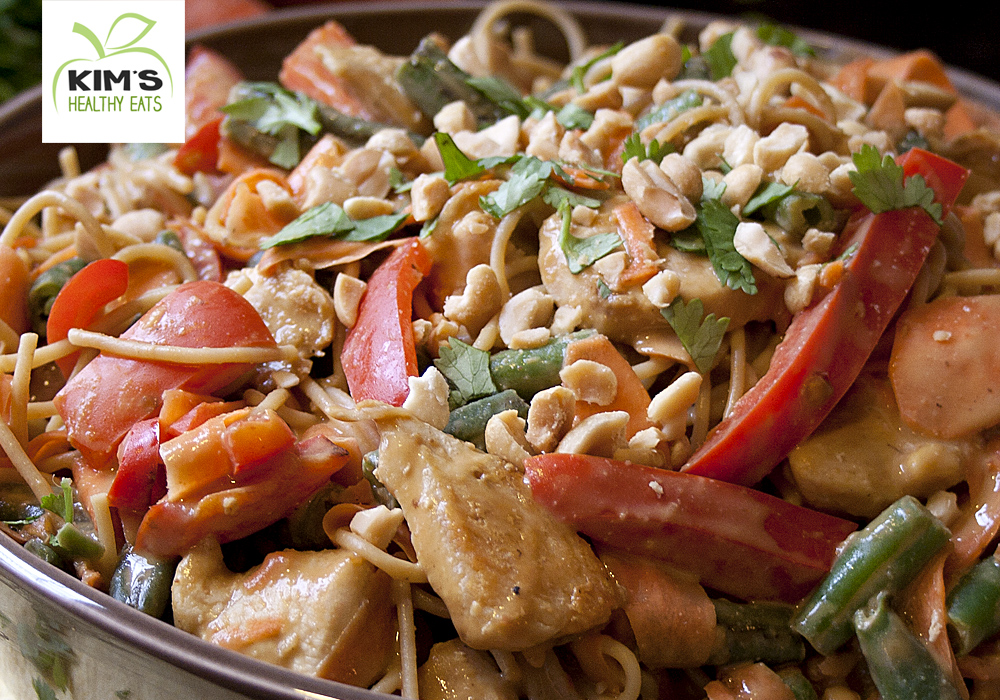
Thai Peanut Chicken Pasta with Vegetables

So you’re probably thinking…Peanut butter and pasta, really? Don’t be fooled, it really is a great combination!  In fact, this is one of the most requested meals by my husband. It’s not very spicy and the peanut butter sauce adds a nice sweetness to the dish so if you’ve never had Thai food before, this is a great recipe to start with.

peanut chicken pasta

tips&tricks

Ginger root is typically large and most recipes call for only a few teaspoons. Don’t let that ginger go to waste. Freeze it. When you need to use it again no need to defrost, it actually is easier to grate while frozen. Just simply peel away the skin and grate. Ginger root will last about 6 months in the freezer. Click here for more information about ginger root.

peanut chicken pasta 02

Ingredients

  • 2 carrots, peeled
  • 2 teaspoons sesame oil, divided (you can use olive oil if you don’t have sesame)
  • 2 teaspoons grated fresh ginger
  • 3 cloves garlic, minced
  • 1 cup low sodium chicken or vegetable broth
  • 1/2 cup of peanut butter (creamy or chunky, whatever you have)
  • 1/4 cup low sodium soy sauce
  • 1 tablespoon brown sugar
  • 3 tablespoons rice vinegar (white vinegar will also work)
  • 1 teaspoon of chili garlic sauce or sriracha (you can find this in the Asian section of the grocery store)
  • 1 cup canned lite coconut milk (found in the baking isle or Asian section)
  • 1 lb chicken breasts cut into strips
  • 1 large red pepper cut into thin strips
  • 1 pound green beans or snow peas
  • 1 box of whole wheat spaghetti or linguine, cooked
  • 1/2 cup fresh cilantro
  • 1/2 cup peanuts for topping (optional)

Directions

  1. Shave carrots with a vegetable peeler and set aside in a bowl.
  2. Heat a sauce pan over medium heat and 1 teaspoon of the oil. Add ginger and garlic, saute for about 30 seconds. Add broth, peanut butter, soy sauce, brown sugar, vinegar, and chili sauce. Stir together until peanut butter is smooth. About 5 minutes. Add coconut milk and stir until heated. Remove sauce from heat and keep warm with a lid on top of pan.
  3. Heat 1 teaspoon of oil in a large skillet over medium high heat. Add peppers and green beans or snow peas, saute for about 5 minutes. Remove from skillet and set aside.
  4. Add chicken strips. Cook chicken strips until no longer pink, about 10 minutes.  Turn off heat.
  5. Add the carrots, sauted vegetables, pasta, and peanut sauce to the cooked chicken in the skillet. Toss well so everything is covered with the sauce. I found that using tongs worked best.
  6. Top with fresh cilantro and peanuts.

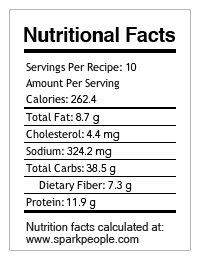
nutrional facts - thai peanut pasta

Enjoy!

Avocado Grilled Cheese Recipe

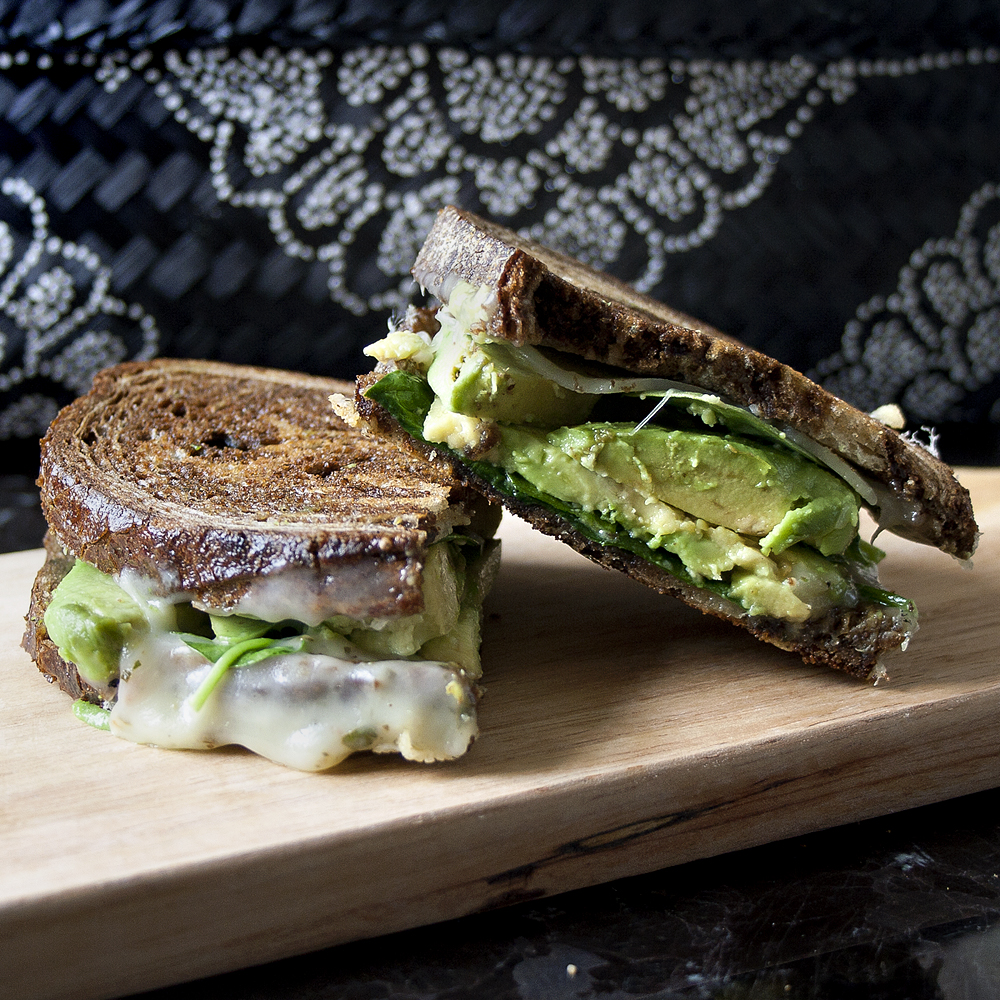
This has got to be one of the best grilled cheese sandwiches I’ve ever made.  All I can say is WOW!

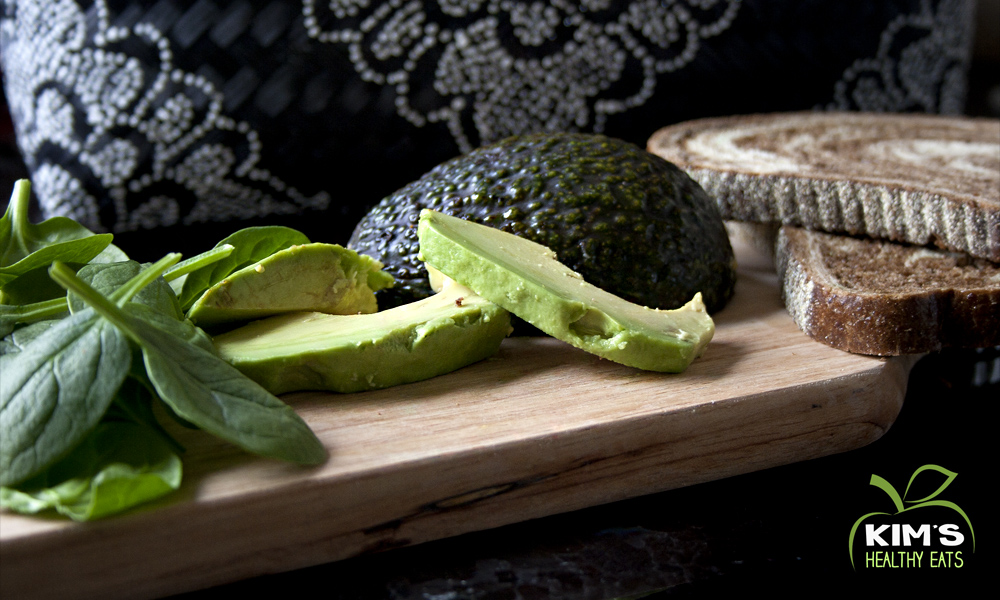
I made this sandwich in my cast iron skillet, which is my absolute favorite pan to cook with.  They’re very inexpensive and cook your food to perfection. I could talk about this pan all day.  Right…back to the grilled cheese sandwich. From the crispy bread and gooey cheese, to the fresh avocado, I can’t decide which part I like best.

avocado grilled cheese 02

did-you-know

Did you know avocados can help fight both oral and breast cancer?  Research has shown that certain compounds in avocados are able to seek out pre-cancerous and cancerous oral cancer cells and destroy them without harming healthy cells. And it’s high in oleic acid, which has been shown to prevent breast cancer in numerous studies.  Click here to learn more.

avocado grilled cheese

Avocado Grilled Cheese
Serves 1
Write a review
Print
Total Time
5 min
Total Time
5 min
Nutrition Facts
Serving Size
557g
Amount Per Serving
Calories 656
Calories from Fat 356
% Daily Value *
Total Fat 41g
63%
Saturated Fat 15g
76%
Trans Fat 0g
Polyunsaturated Fat 4g
Monounsaturated Fat 19g
Cholesterol 59mg
20%
Sodium 898mg
37%
Total Carbohydrates 49g
16%
Dietary Fiber 16g
63%
Sugars 5g
Protein 31g
Vitamin A
652%
Vitamin C
176%
Calcium
90%
Iron
68%
* Percent Daily Values are based on a 2,000 calorie diet. Your Daily Values may be higher or lower depending on your calorie needs.
Ingredients
  1. 2 slices of your favorite bread, I used a marble rye fresh from the bakery
  2. Little bit of coconut or olive oil to spread onto bread
  3. 1 teaspoon pesto sauce
  4. Fresh baby spinach leaves
  5. 1/2 of a ripe avocado, sliced
  6. 2 slices of cheese, I used pepper jack, but I think fresh mozzarella or cheddar would also taste great
Instructions
  1. Heat skillet on medium heat.
  2. Spread a thin layer of oil over one side of each slice of bread. Flip over and spread the pesto sauce onto each slice of bread.
  3. Add slices of cheese to each slice of bread. Top with spinach and avocado.
  4. Fold together to create a sandwich.
  5. Place in heated skillet and cook for about 3-4 minutes on each side. I like to put another heavy pan on top of the sandwich to make it a pressed sandwich.
Kim's Healthy Eats https://www.kimshealthyeats.com/
 

Follow us on Facebook to receive alerts of all our new and exciting recipes.

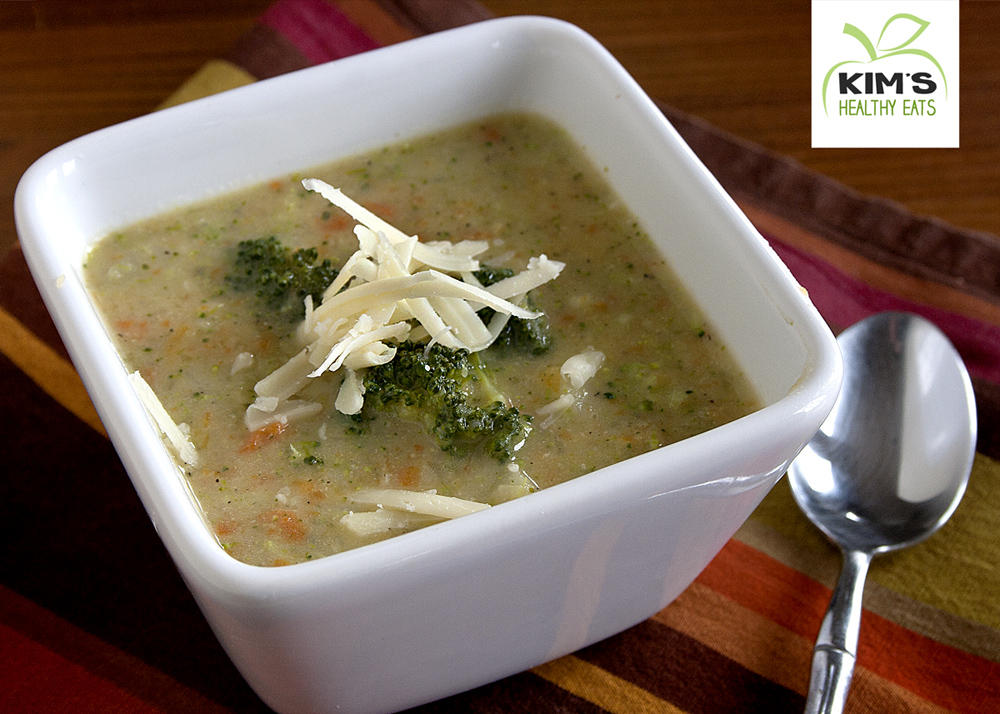
Cheddar Vegetable Chowder

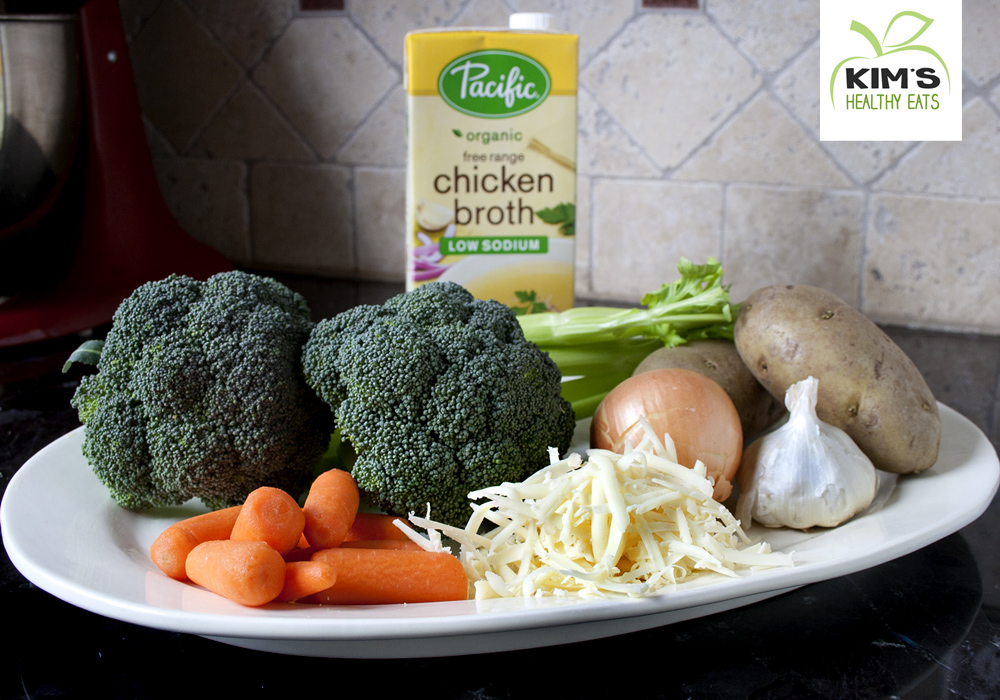
Between work, the gym, and dance classes for my daughter, it’s tough to find time during the week to make dinner. So on Sundays I like to make a few meals to prepare for the busy week.  I try to keep them simple and healthy. You may want to double this one though, since most of it was gone by lunch.

vegetable chowder

vegetable chowder 02

Ingredients

  • 1 tablespoon olive oil
  • 1 small onion, finely chopped
  • 2 carrots, finely chopped or shredded
  • 2 celery stalks, finely chopped
  • 2 garlic cloves, pressed
  • Salt and pepper to taste
  • 4 cups vegetable or chicken broth (low sodium)
  • 2 large potatoes, peeled and chopped
  • 1 tablespoon flour
  • 1/2 cup of water
  • 2/3 cup of milk (I used almond coconut)
  • 2 cups broccoli, chopped into small pieces
  • 1 cup of cheddar cheese

Directions

  1.  In a large pot heat olive oil and add onion, carrots, and celery. For easy prep I used the food processer attachment from my immersion blender to chop this veggies quickly. Saute veggies for a few minutes and add pressed garlic and cook for 2 more minutes. Add salt and pepper.
  2. Add vegetable or chicken broth and potatoes and bring to a boil. Cook until potatoes are tender.
  3. In a small bowl mix water and flour and add to soup. Bring to a slight boil and heat for a few minutes until thickened.
  4. Add milk and broccoli. Cook until broccoli is tender about 5 minutes.
  5. Add cheese and stir until melted. I used my immersion blender to make the soup a little smoother, but this step is not needed.

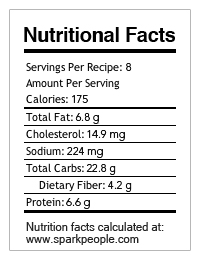
nutrional facts - veg chowder

Roasted Chickpeas

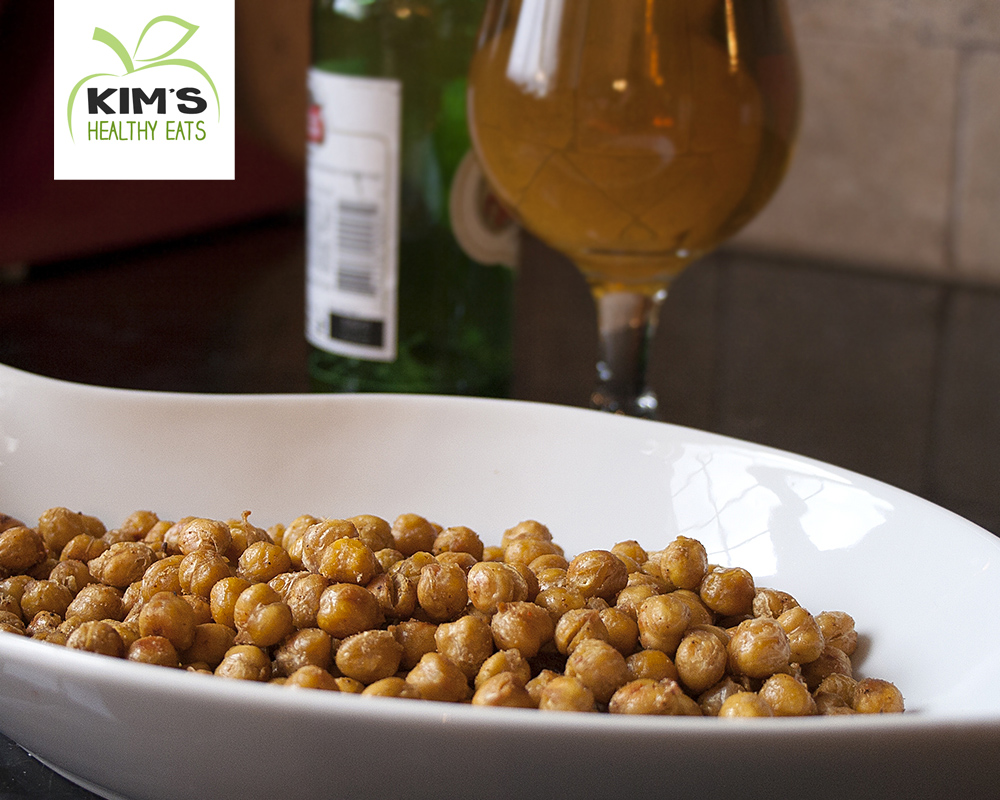
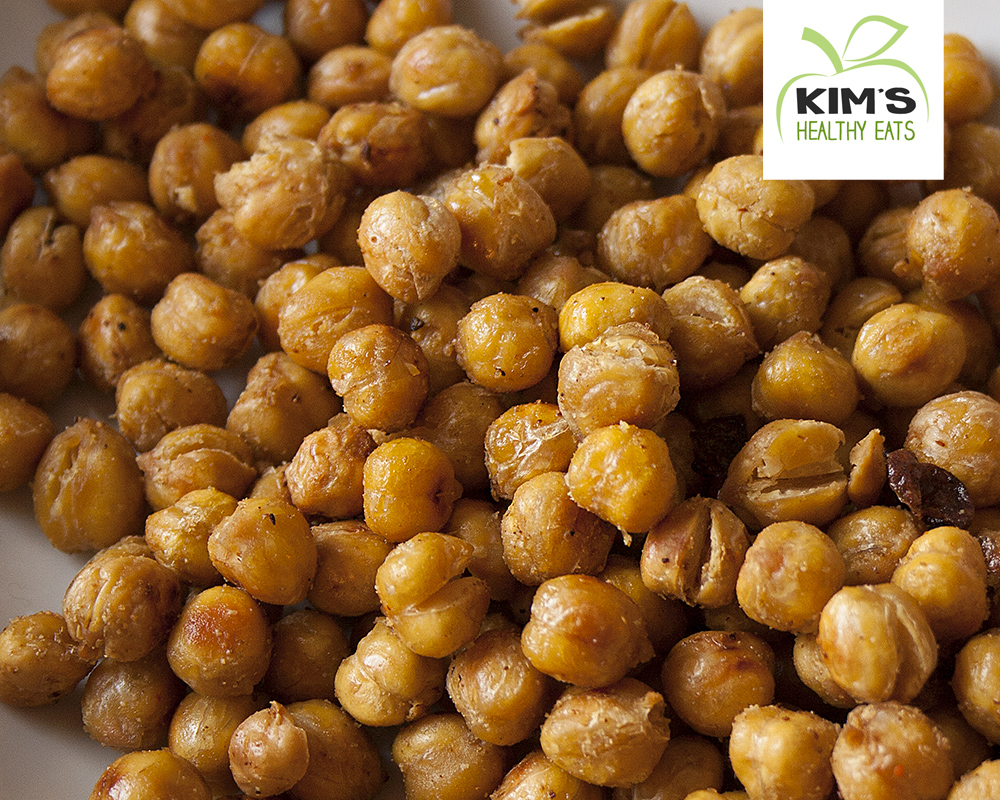
Perfect guilt free Friday night snack. Roasted chickpeas also make a great afternoon snack when you are craving something salty. They are much healthier than grabbing something at the vending machine and it only cost me about $2 to make this batch.

Roasted Chick Peas 01

Roasted Chick Peas 02

Ingredients

  • 2 can chickpeas (garbanzo beans), drained and rinsed
  • 1 tablespoon olive oil
  • 1 teaspoon cumin
  • dash of garlic powder
  • dash of cayenne pepper (optional)
  • dash of sea salt

Directions

  • Pre heat oven to 400 degrees.  After draining and rinsing the chickpeas, place them in a single layer on a paper towel and dry by layering another paper towel overtop.
  • Place dry chickpeas in a bowl and mix in olive oil, and spices, and stir.
  • Place chickpeas in a single layer on a baking sheet with sides since they need to be shaken a little during cooking.
  • Bake for about 25 to 30 minutes, shaking the baking sheet about every 10 minutes. They do brown quickly so keep an eye them during the last 10 minutes of baking.

nutrional facts - chick peas

TGIF!

Black Bean Brownie Bites

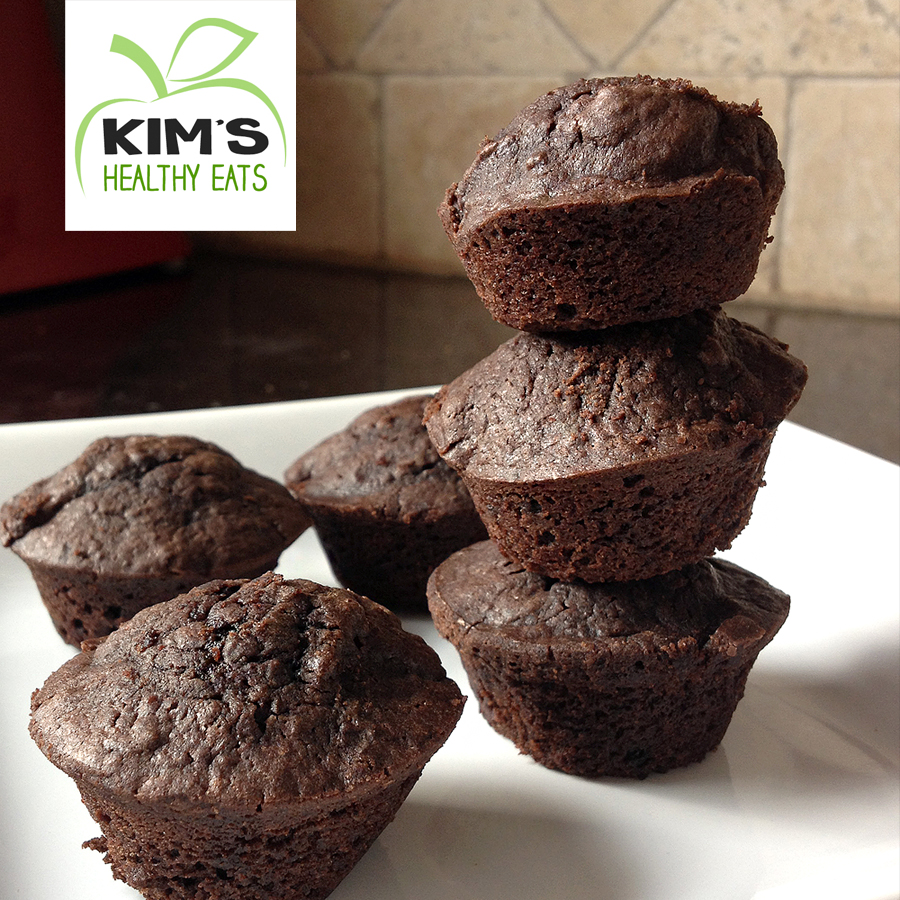
I have heard of making black bean brownies, but never actually tried them until my friend made these delicious little bites for a snack at the beach last summer.  Why didn’t I try this sooner?  Yummy!  They are super easy and no one will know there is black beans in them. You have to give them a try!

Black Bean Brownies

Ingredients

  • 1 15 ounce can black beans, rinsed and drained
  • About 1/3 cup of water, to moisten black beans
  • 1 package of your favorite brownie mix (I try to buy organic or Trader Joe’s to avoid the additive junk in regular brownie mix)


Directions

  1. In a food processor or blender,  puree black beans and add water to moisten beans. Make sure beans are completely smooth. They actually turn a purple color.
  2. Add brownie mix to a large bowl and pour in pureed beans. Mix until a batter is formed.
  3. Spray muffin tin or pan with cooking spray. I make them in a mini muffin tin for portion control, but can easily be made in a pan.
  4. Bake according to brownie box directions. In a mini muffin pan I baked at 350 for about 18-20 minutes.
  5. Serve with a side of fresh berries.

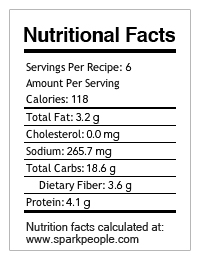
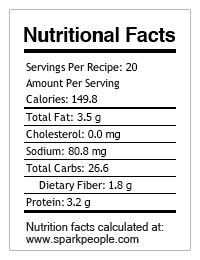
Nutrition Facts

Enjoy!

Thin Sliced Roasted Potatoes

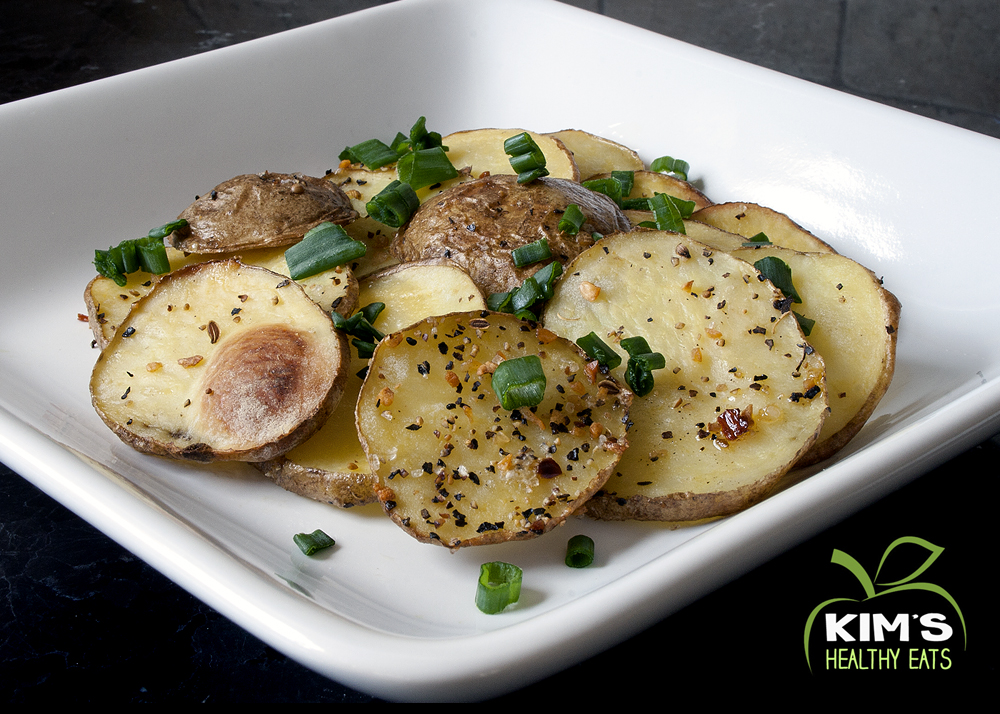
February is National Potato Lovers Month!  To celebrate I made my favorite roasted potato recipe.  These are easy to make and are a great side dish with almost any meal. Crispy and delicious, you’ll keep going back for more.

potatoes

Ingredients

  • 2 lbs potatoes (any kind will work, I like red or yukon gold)
  • Drizzle of olive oil
  • 1 tablespoon Montreal Steak Seasoning
  • Parmesan cheese (optional)

Directions

  1. Heat oven to 400 degrees. 
  2. Cut potatoes in thin slices and spread in a single layer on a baking sheet. (I use a stone which I feel works best). Drizzle with olive oil and steak seasoning.
  3. Bake for about 20 minutes, or until potatoes are nice and crispy.
  4. Top with parmesan cheese.

Chicken Salad Recipe

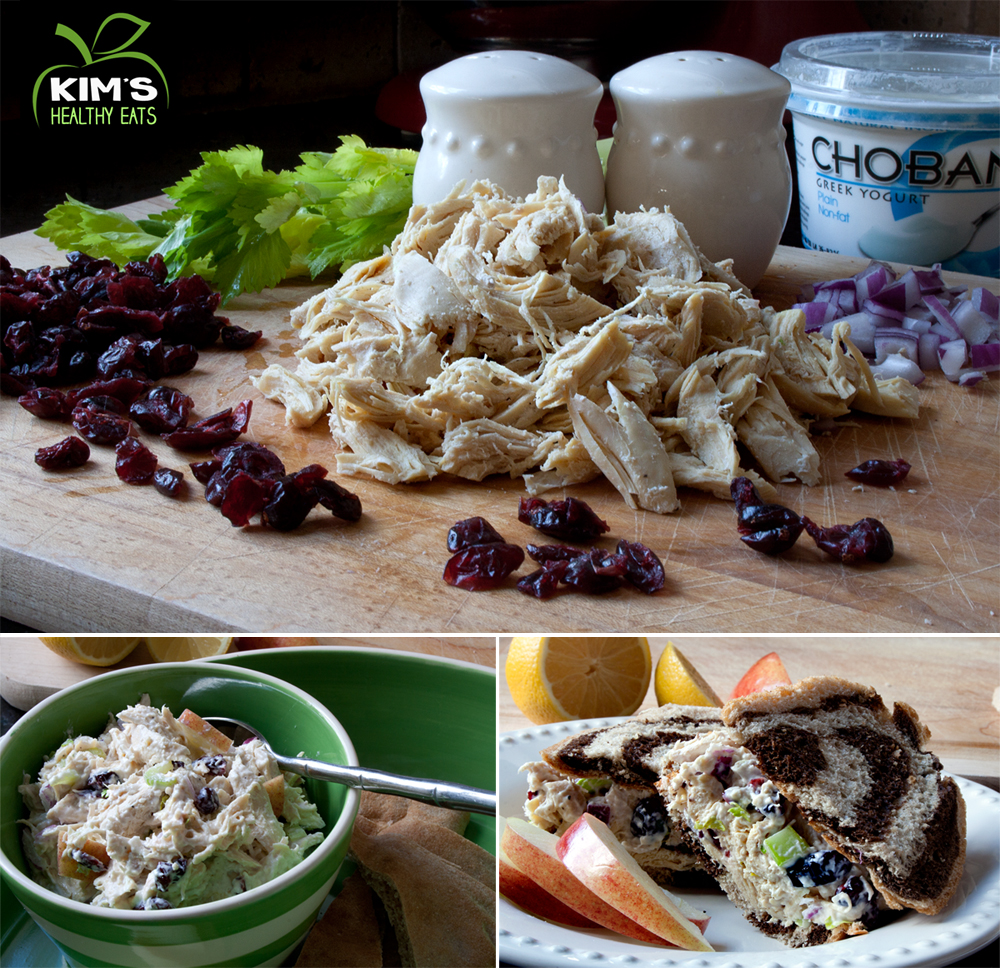
Looking for something different for lunch?  This chicken salad full of fruit and nuts will keep you feeling full.  It tastes great on rye and pumpernickel bread, on a bed of lettuce, with crackers for a snack, or how I like to eat it, right off a spoon!

Chicken Salad

Ingredients

  • 2 large chicken breasts, boiled and shredded, or a rotisserie chicken shredded
  • 2 celery stalks, chopped
  • 1/4 cup red or white onion, diced
  • 1 apple, diced
  • 1/2 cup dried cranberries
  • 1/4 cup walnuts or sliced almonds
  • 1/4 cup plain Greek yogurt
  • 2 tablespoons mayo, I used the kind with olive oil
  • 1/2 a lemon
  • Salt and pepper to taste

Directions

  1. Boil chicken breast in water and some salt and pepper until cooked through. About 20 minutes depending on the size of the chicken. Cool and  shred the chicken with 2 forks. A rotisserie chicken from the grocery store would work too.
  2. In a large bowl mix chicken, celery, onion, apple, cranberries, nuts, yogurt, mayo, and lemon juice. The yogurt and mayo can be adjusted to taste. Salt and pepper to taste. The longer the chicken salad marinades the better it tastes.
  3. Serve as a sandwich, or on a bed of lettuce.

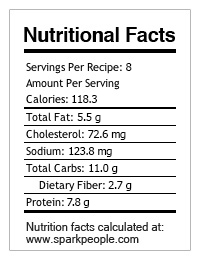
nutrional facts - chicken salad